Before I start, I apologise about the quality of the images I was using my kindle camera which is a bit pants so they’re not great.
There is nothing tastier than your own homemade yoghurt. Seriously, it is delicious and do you know what’s even better, it’s (a) really easy, like ridiculously so and (b) it’s really cheap. Oh and it’s really good for you, including your waistline
I like others have a dream of being as self sufficient as possible (this is quite ironic when you consider that I can’t even stand up without help, let alone walk) and to that end I had been seriously looking at making my own yoghurt for quite some time. The problem was that every recipe I found required a heat pad as a way of keeping the yoghurt at a constant warm temperature. Now when I looked up heat pads I discovered that they are in fact meant for muscular aches and pains.
This got me to thinking, is it really safe to place a liquid in a tub on top of an unstable electrical heat pad in a kitchen? hmmmm, I think not.
So my yoghurt making dreams were put on hold again.
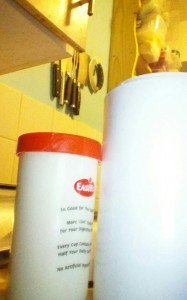
That was until Christmas when my mother bought me an Easiyo yoghurt making kit, my whole world changed at that moment.
Now for those who don’t know, Easiyo is an inexpensive bit of kit that makes yoghurt making a doddle. In the starter kit you get a yoghurt sachet, a litre container, some berries, a cookbook and the Easiyo yoghurt making thingymajig.

So after using the sachet they give you I was hooked, this stuff wazs easy-peasy to make and tasted so much better than store bought ones. The makers say it’s really economical to use their sachets so I went and had a look on the old interweb. Um, excuse me Mr Men but spending over £7 (by the time you’ve included postage) to make a litre of yoghurt is not cheap, especially when you can buy it as low as 55p for half a litre in some supermarkets (yes, I know that’s the value brands but that’s not the point).
My heart sank, bang went my yoghurt making aspirations again, that was until I got back on my trusty [key]board and surfed the ol’ net again to see if there was some way to make yoghurt without using their expensive sachets and would it taste as good and be as good for me…. then
Halleluiah (sounds of horns and organ music)
I found that I could. Now credit where credit’s due, the recipe I first used for this was from Sustainable Suburbia and I have tweaked it as I have gone along.
Now the first thing i want to say is, don’t listen to the yoghurt making manufacturers, they try and suggest that it is impossible to make good tasting, healthy yoghurt with lots of good bacteria in unless you use their sachets.
Before you panic stop and think about it. I checked their ingredients and it was essentially dried milk with some good bacterias added, so you have nothing to worry about. You are essentially making yoghurt in the same way as the other recipes on the internet it’s just that you won’t burn your house down with an inappropriate piece of equipment. All you really need the yohgurt maker for is keeping your temperature constant.
Ok let’s get started…..
YOU WILL NEED:
1 yoghurt maker (essentially a flask type thing)
3-7 tablespoons (I have used anywhere between these amounts) of recently made yoghurt, this is where your Easiyo starter sachet comes in real handy as if you get through yoghurt as quickly as we do, you know it’s fresh and that the lovely bacteria is ALIVE.
Milk powder (skimmed milk powder is fine, that’s all we can get, and the budget varieties have worked just as well as the expensive ones in our house)
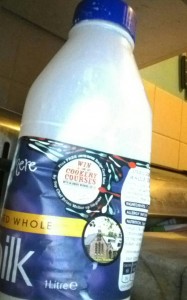
UHT/Homogenised/Sterilised Milk
Freshly boiled water
Yes that really is all you need!
So first things first, in your heat proof litre container pour about 300ml of the milk and then add between 3 and 6 tablespoons of the powdered milk (depending on how thick you like your yoghurt). To be honest I do not measure, I just shake it in and guesstimate that it’s right.
Once you’ve done that pretend you’re Tom Cruise (or in my case Thomasina) in Cocktail and get shaking like your life depends on it
Note: It is not enough to just shake your behind, you need to shake the container too
Now your liquid is like Elvis (all shook up) unscrew the lid and add the yoghurt you saved from the orginal packet back in. If you don’t have any, don’t worry, using any fresh yoghurt will work, you just need to know it’s fresh.
Next, fill your container up to about a litre with the rest of your milk. Now don’t worry if you can’t fit that much in, sometimes I’ve shaken it up so well that I have so much froth is is difficult to get much in, I have now learnt, don’t worry just fill it up till it’s full (don’t tip any out to make room).
Now get dancing again and shake it up (once you’ve put the lid on obviously).
Get your yoghurt maker and fill it up with just boiled water until that baffle is covered. Do not worry if you’re baffled by what a baffle is, I was (or maybe I’m just an idiot and everyone knows), the baffle is just the red thing with a hold in the middle inside the maker.
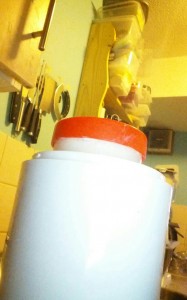
If you don’t have a yoghurt maker don’t worry, I imagine a large food flask a third filled with boiling water and a container in would work just as well. Remember the only thing we really need it for is maintaining a constant source of heat.
Now you have to leave this for between 8 and 12 hours, depending on how tangy you like your yoghurt. Basically the longer you leave it, the thicker and tangier it will become. It generally goes from a thick pouring yoghurt consistency to a greek yoghurt consistency. If you like you can leave it even longer, upto 24 hours is safe. We left it for 16 by mistake and it was a bit like fromage frais.
Once your time is up take the container out and place it in the fridge. Once it has cooled down and finished setting, usually about another 4 -6 hours, it’s ready to eat. Just remember to get a long handled spoon and give it a really good stir to make sure everything is really well incorporated.
Now it’s ready to eat. This plain yoghurt tastes delicious with honey mixed in, with fruit and in smoothies. You can use it in cooking too. If you like your yoghurt a little sweeter here’s a tip:
Get another container and follow the recipe through, using your homemade yoghurt. Then just before you put the lid on and shake for the last time, add 2 tablespoons of caster (fine) sugar, you can add more of less to taste the next time you make it. The carry on with the recipe as before!
I will update this with a photo of made yoghurt when I have time to take a photo of it before my family wolf it down.
